Vendors
What it does
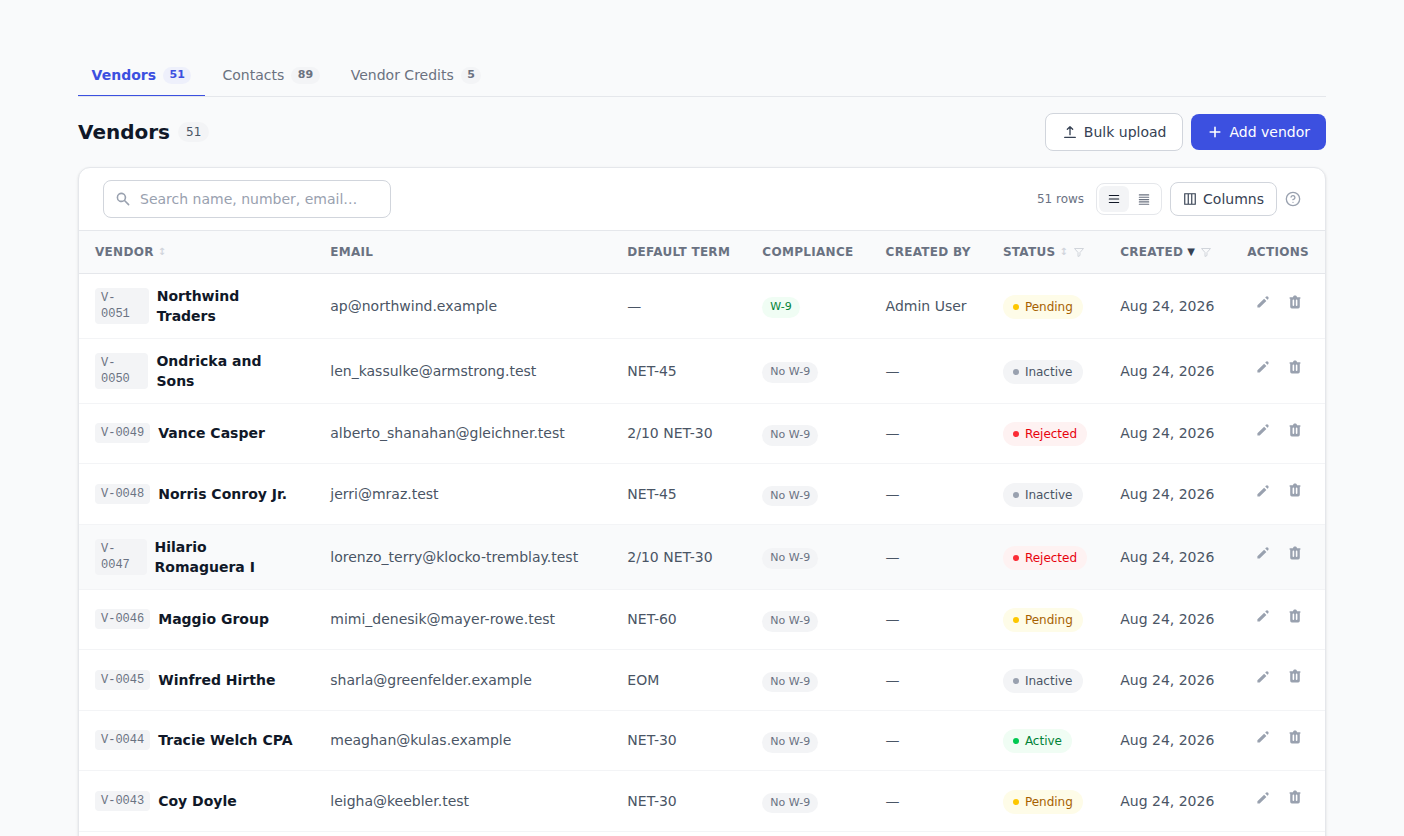
Vendors are the companies and people you buy from. A vendor record holds their name, contact details, addresses, payment terms and tax details, so you don't have to re-enter any of it every time you raise an order or a bill.
How to use it
Add a vendor
- Click Vendors in the sidebar.
- Click Add vendor (on an empty list it reads + Add your first vendor).
- Fill in Name, and Email if you have it.
- Under the address, fill in Line 1, City, Region/State, Postal, and pick a Country.
- Pick a Currency if the vendor doesn't bill you in your usual one.
- Click Create vendor.
Optional things you can add on the same form:
- Phone — as you type a US number it formats itself, like
(415) 555-0132. For a number outside the US, pick the country code beside the box and type the rest. - More addresses — click + Add address and fill in the new block. Use the primary address radio to mark which one is the main one, or pick No primary address.
- Contacts — click + Add contact and fill in the person's name, email and title. You can add several. See Vendor contacts.
- Payment terms — click + Add term, pick a Term such as NET-30, and mark one of them as the default. See Company settings for setting up the terms themselves.
- Tax details — choose Company or Individual. The tax box relabels itself to EIN or SSN and shows the format it expects. Tick International vendor for a vendor outside your country, and tick the 1099 box if they're 1099-eligible — that reveals the W-9 card.
Let BotDoPay fill the form in for you
If you have one of the vendor's invoices as a file, you don't have to type their details.
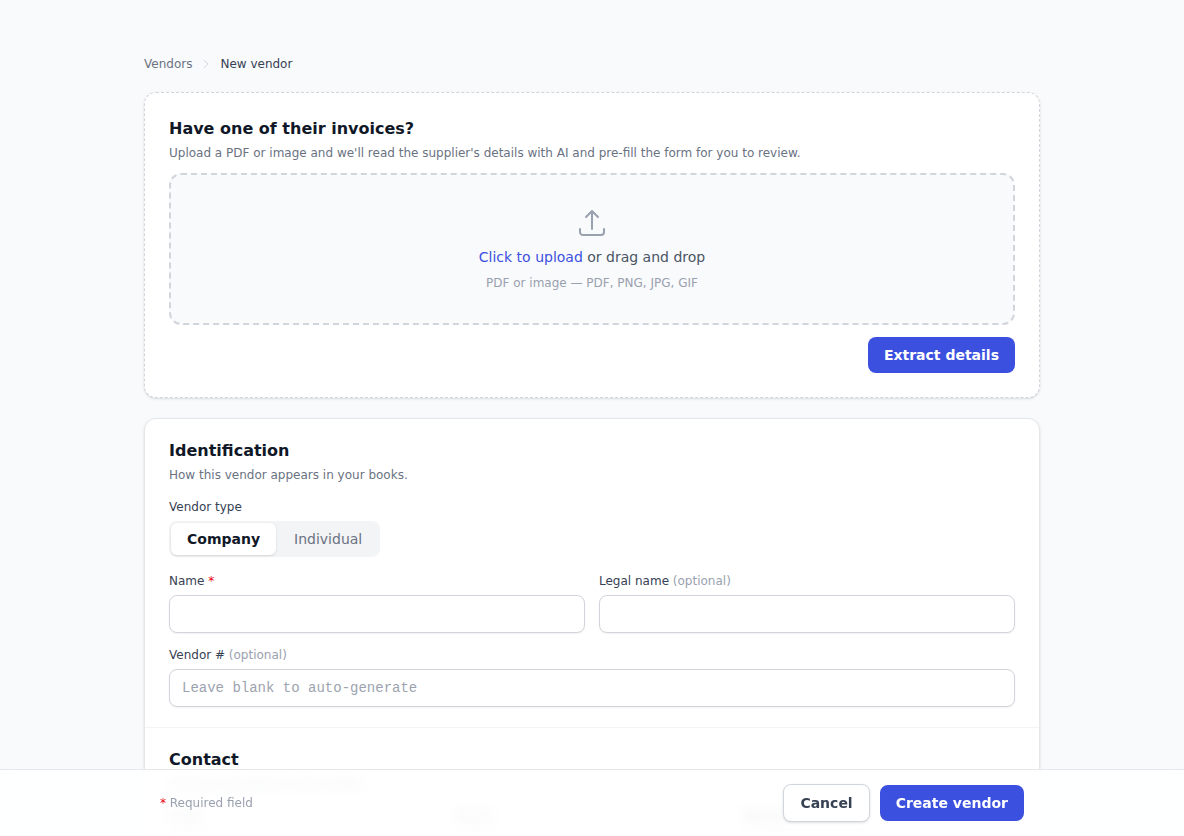
- On the new-vendor form, find Have one of their invoices?
- Click Click to upload and choose a PDF or image (PDF, PNG, JPG or GIF).
- Click Extract details.
- BotDoPay reads the file and fills in what it found. Check every field, correct anything that looks wrong, and click Create vendor.
If the details match a vendor you already have, you'll see a duplicate warning before you save.
Approve, pause or remove a vendor
Open a vendor from the list and use the buttons on their page:
- Approve — moves a vendor from Pending to Active, so you can trade with them.
- Reject — marks them Rejected.
- Deactivate — makes them Inactive without losing the record.
- Delete — removes them from your lists.
Edit a vendor
Open the vendor and click Edit. Change what you need and click Save changes.
See a vendor's whole story
A vendor's page pulls together everything you've done with them: their purchase orders, bills and payments, their contacts, their payment methods, and a History panel showing who changed what and when, newest first.
The Vendor summary panel also records Created by and Approved by, so you can see who added the vendor and who signed them off. Either reads — on a vendor that arrived without a person behind it — synced in from your accounting system, or added before this was recorded.
Add a lot of vendors at once
Click Bulk upload on the vendor list to bring in a spreadsheet of vendors. See Importing your data.
Troubleshooting & Help
- The email box won't accept what you typed. Type a full address including the part after
the dot —
ap@acme.com, notap@acme. - "must be 9 digits." EIN and SSN both need nine digits. The hint under the box shows the shape it expects.
- The tax number shows as dots. Tax numbers are hidden on screen by default. Click the eye icon beside the box to reveal it. On a saved vendor you'll see only the last four digits.
- Your payment terms won't save. Once you've added at least one term, exactly one of them has to be marked as the default. Pick one and save again.
- Your phone number looks odd. Numbers already saved are left exactly as they are. Clear the box and retype it if you want the newer formatting.
- A vendor you added isn't in the list. Check the filter chips above the list — the list may still be filtered to one status. Click Clear all.