Bills
What it does
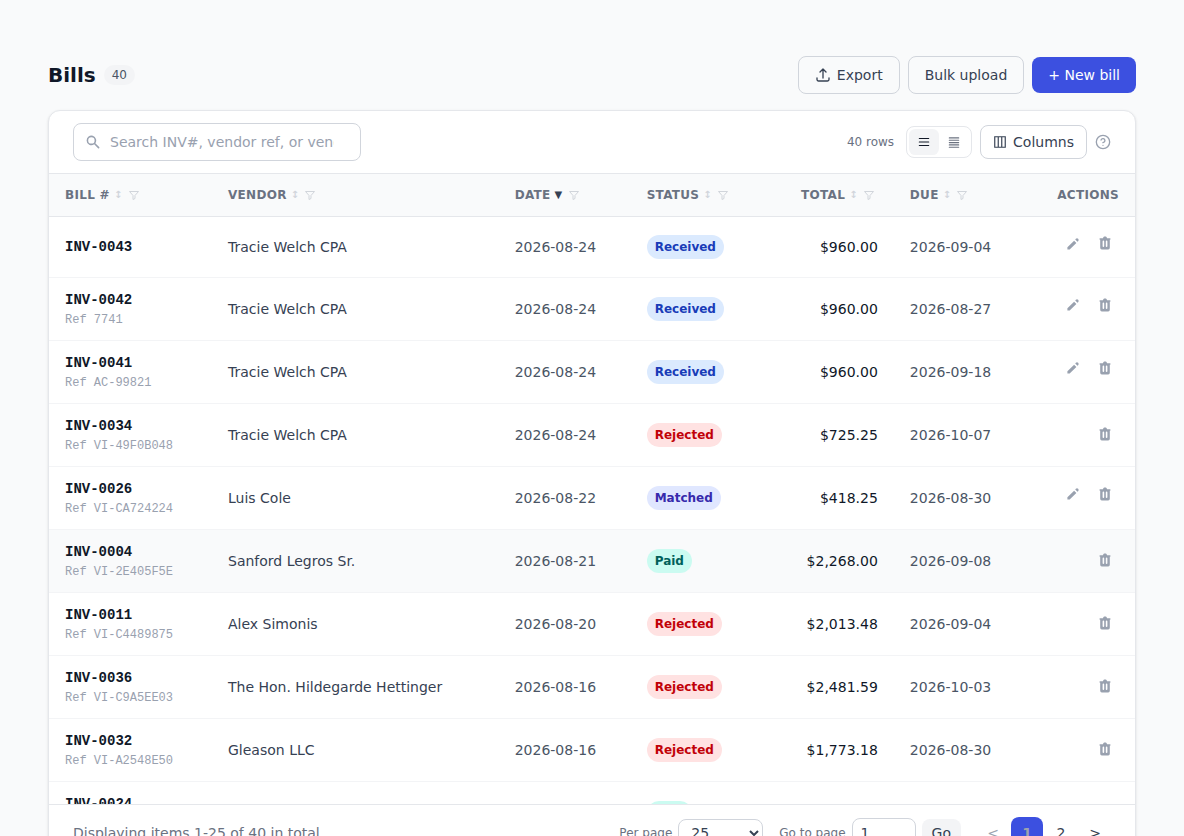
A bill is an invoice a vendor sent you. Recording it in BotDoPay puts it in the queue to be checked, approved and paid, and lets you match it against the order you placed so you only pay for what you agreed to.
How to use it
Record a bill by hand
- Click Bills in the sidebar.
- Click + New bill (on an empty list it reads + Record your first bill).
- Choose the Vendor. The currency fills in from the vendor's own settings.
- Fill in Vendor invoice # — the reference printed on their invoice — and the Due date.
- Fill in the first line: Description, Qty, Unit price, and pick an Account. Tick Taxable on any line that tax applies to.
- Click + Add line for each extra line. Remove drops one.
- If tax applies, fill in Sales tax rate (%). Only lines you ticked as Taxable are taxed.
- Check the totals at the bottom, then click Record bill.
Let BotDoPay read the bill for you
If you have the invoice as a file, you can skip most of the typing.
- On the new-bill form, find Have the bill as a file?
- Click Click to upload and choose a PDF or image (PDF, PNG, JPG or GIF).
- Click Extract data.
- BotDoPay reads the file and fills in what it found. Check every field — especially amounts and dates — fix anything wrong, and click Record bill.
To do a whole stack at once, see Importing your data.
Link a bill to your purchase orders
- On the bill form, use the purchase-order picker to add a PO. Only that vendor's POs are offered.
- The PO's lines are added to the bill, on top of anything you already typed — nothing you entered gets wiped. Each PO you add appears as a chip.
- Add a second PO if the bill covers more than one order. Your edits to the first PO's lines survive.
- To drop a PO, click the × on its chip and confirm. That removes the lines that came from that PO and leaves everything else alone.
If the PO was taxable, its tax rate is copied across and the lines are ticked as Taxable for you.
Once a bill is linked to POs, its page shows a comparison panel with each PO's total and a combined Σ PO totals, so you can see at a glance whether the bill agrees with what you ordered. A bill that lines up reads Matched.
Approve or reject a bill
Open the bill. If it's waiting on you, an approval box sits at the top of the page with Approve and Reject. Click one; rejecting asks you to confirm.
If your company uses approval workflows, the same box walks the bill through the steps your company set up. See Approvals.
You can't approve a bill you created yourself — the box tells you another approver must approve it, and offers you Reject only.
Edit a bill
Open the bill and click Edit. If it was already matched to a purchase order, a note warns you that saving changes will reset the match; after saving, the bill goes back to Received and needs matching again.
Attach files to a bill
A bill's page has a documents panel. Use it to keep the original invoice, a delivery note, or anything else you'd want to find later, attached to the bill.
Find a bill
Search by vendor name, the vendor's reference, or the bill number. Filter by status — the status filter shows how many bills sit in each one. See Working with lists.
Troubleshooting & Help
- "Description can't be blank." Every line needs a description. Fill it in, or remove the empty line.
- The tax looks too small. Tax only applies to lines you ticked as Taxable. Tick the ones that should be taxed.
- The bill's status went back to Received after you edited it. That's expected — editing a matched bill resets the match so it can be checked again.
- There's no Approve button. Either the bill isn't waiting on you, or you created it — you can't approve your own. Someone else at your company needs to approve it.
- You can't remove a bill. Bills that are already approved or paid can't be removed. If it was genuinely wrong, ask an admin at your company.
- A bill you removed by mistake. See Removed records to restore it.
- "No rows match." Your filters are too narrow. Click Clear all filters.