Purchase orders
What it does
A purchase order (PO) is your formal order to a vendor: what you're buying, how many, at what price, and where to ship it. It's the document the vendor works from, and later it's what you check their bill against.
How to use it
Create a purchase order
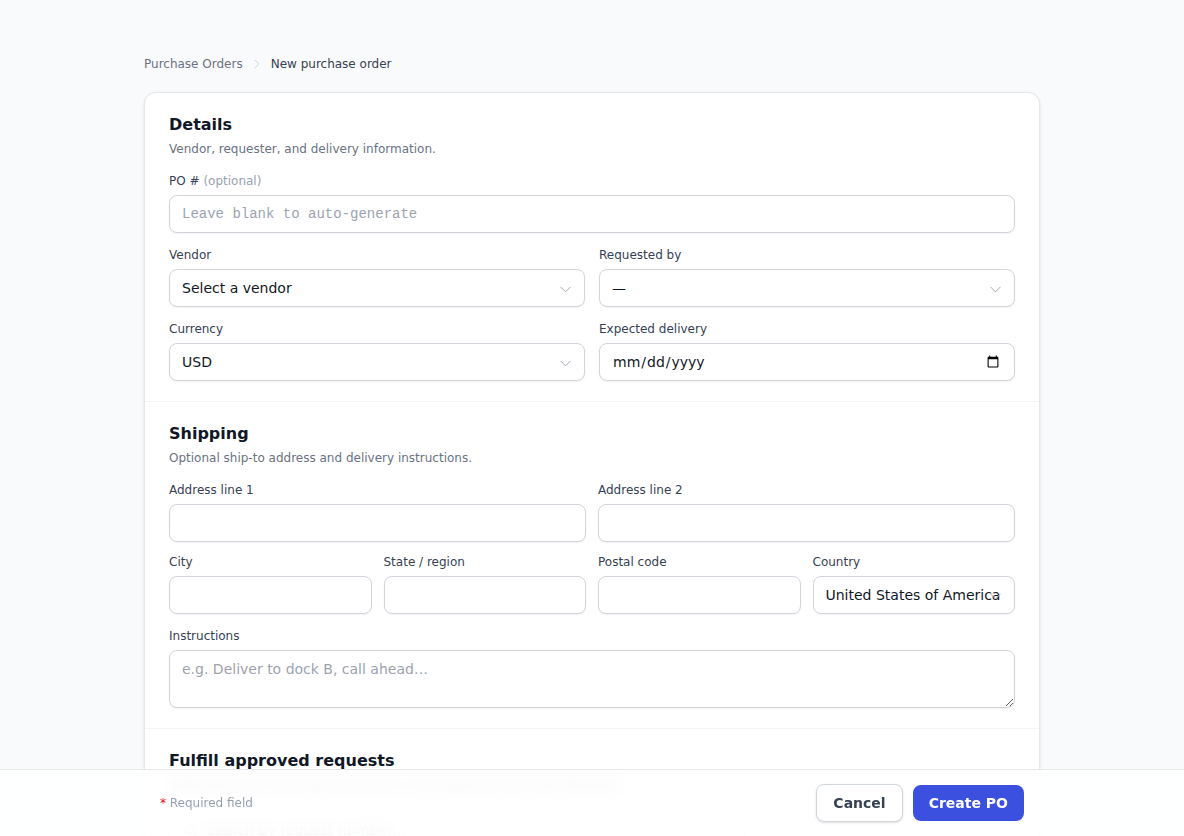
- Click Purchase Orders in the sidebar.
- Click New PO.
- Choose the Vendor.
- Fill in the first line: Item, Qty, Unit $, Tax %, and pick an Account so the cost lands in the right place in your books.
- Click + Add line for each extra thing you're ordering. Click Remove on a line to drop it.
- Watch the totals at the bottom — they update as you type.
- Click Create PO.
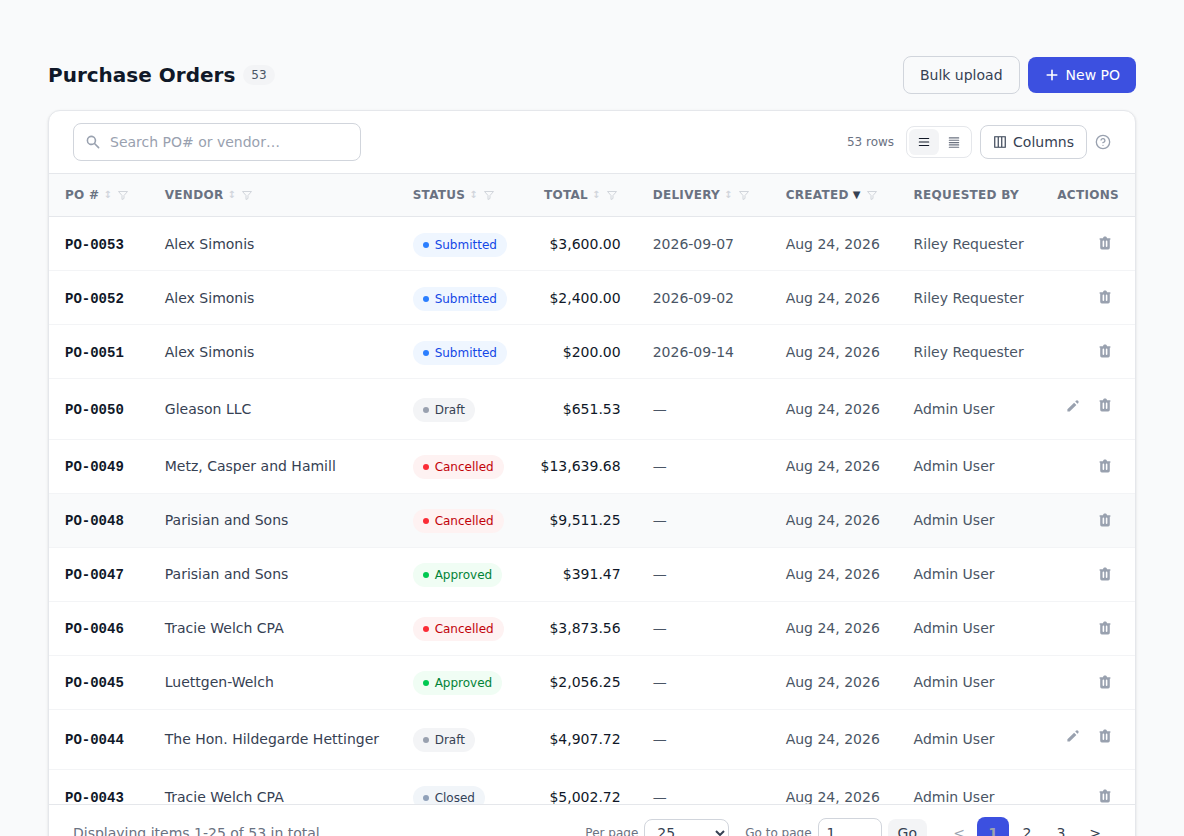
Your PO is saved as a Draft with a number you can share with the vendor.
Two things worth knowing while you build a PO:
- One tax rate for the whole order. Instead of a rate per line, fill in Line items tax %. The per-line boxes grey out and the single rate applies to everything.
- A new account, without leaving the form. If the account you need doesn't exist yet, click + New on the line, fill in Code, Name and Account type, and click Create account. It lands selected on the line you were filling in.
Add shipping details
Fill in the shipping block on the form — Address line 1, City, State / region, Postal code, Country, and any Instructions for the driver, like "Call ahead". These show on the PO's page for anyone who needs them.
Move a PO through its life
Open the PO and use the buttons on its page. Each one asks you to confirm:
- Submit — sends it for review. It becomes Submitted.
- Approve — approves it. It becomes Approved. If your company uses approval workflows, you'll see an approval box at the top of the page instead — see Approvals.
- Receive — marks the goods as arrived. It becomes Received.
- Close — finishes it off. It becomes Closed.
Cancel stops a draft you no longer want.
If you need to undo a step, Revert to submitted and Revert to draft take a PO back. Reverting clears the decisions that were already made, so the PO has to be approved again.
Turn a PO into a bill
When the vendor's bill arrives, open the PO and click Create bill. The bill form opens with the vendor, the lines and the totals already filled in — adjust the quantities to what you were actually billed for, and save. See Bills.
Find a PO
Search the list by vendor name or PO number, and filter by status. Click a PO number to open it, or a vendor name to jump to the vendor. See Working with lists.
Add a lot of POs at once
Click Bulk upload on the purchase-order list to bring in a spreadsheet, or upload PO files and let BotDoPay read them. See Importing your data.
Troubleshooting & Help
- "Description can't be blank." Every line needs something in Item. Fill it in, or remove the empty line, and save again.
- The total isn't what you expected. Check the Tax % boxes and the Line items tax % box — if the order-wide rate is filled in, it overrides the per-line rates.
- You can't see a + New button beside Account. Creating accounts isn't part of everyone's access. Pick an existing account, or ask an admin to add the one you need.
- There's no Revert button. Reverting isn't available to everyone. Ask an admin or a manager at your company.
- Your new PO vanished from the list. The list may be filtered to a status your draft isn't in. Click Clear all on the filter chips.